How to Install an Outdoor Fitness Trail: A Step-by-Step Guide
L'installation d'un parcours santé se déroule en trois étapes : choix des agrès conformes à la norme EN 16630, implantation et ancrage, puis contrôle de réception. Le sol de réception se calibre sur la hauteur de chute libre de chaque agrès. Le registre de contrôle et le plan de maintenance doivent être établis dès la mise en service.
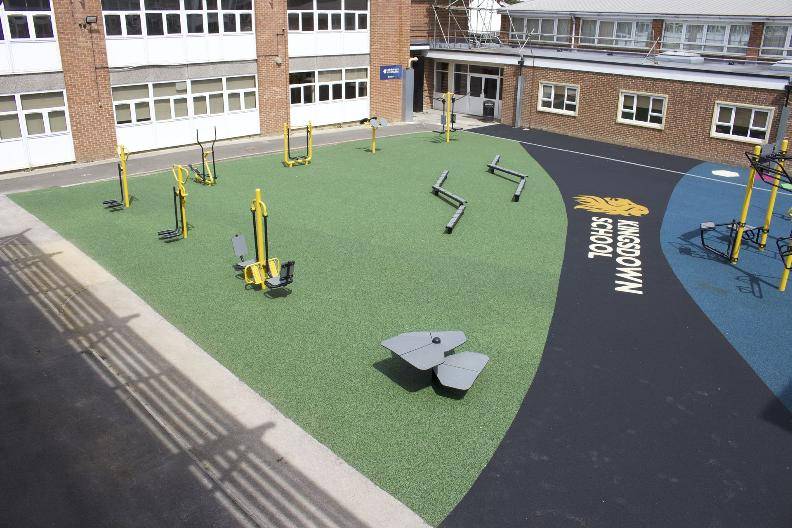
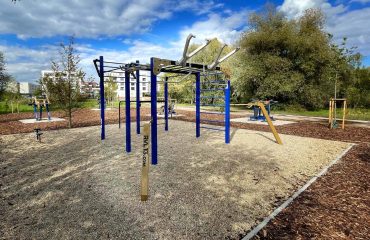
An outdoor fitness trail is a route through a park, a campsite, a residential development or a school ground on which a series of exercise stations combine cardiovascular work, strength work and balance work into one complete circuit. For the people who use it, it is free at the point of use and open to everyone. For the organisation that installs it, it is a construction project with a specification, a set of standards, an anchoring method and a maintenance obligation.
Installing one is not the same as putting gym equipment in a room. Location, safety, surfacing and local regulation all have to be resolved before the first post goes in the ground. This guide walks through the three stages in order: getting the right equipment, planning and building, and the post-installation checks. In summary, installing a fitness trail means selecting stations compliant with EN 16630, setting them out and anchoring them, and then carrying out an acceptance inspection. The impact-attenuating surface is dimensioned from the free fall height of each station, and the inspection register and maintenance plan must exist from the day the trail is commissioned.
Step 1: getting the right equipment
Choosing the right equipment is what determines whether the trail is safe and whether it survives its first decade outdoors.
Start with the location. It needs to be an open space with enough room for all the stations, and it needs to be assessed before anything is ordered, because the site dictates the layout and the layout dictates the equipment list.
Once the location is identified, move on to selecting the stations themselves. Outdoor fitness equipment for adults is covered by EN 16630. That is the standard to specify, and it is the one an inspector will look for. It is not interchangeable with the playground standards: children play equipment falls under EN 1176-1, with impact-attenuating surfacing under EN 1177. If your scheme mixes an adult trail with a children area, those are two separate specifications on the same site, and equipment for children is never certified under EN 16630.
Make sure you have all the tools the installation requires. That includes a spade, a hammer, a saw and a drill. Safety equipment matters just as much, so gloves, protective goggles and a helmet belong on the list too.
Beyond that, research the equipment properly and choose stations made from high-quality materials and suited to the age group that will use them. Safety comes first, so do not cut corners on the equipment, the tools or the personal protective equipment.
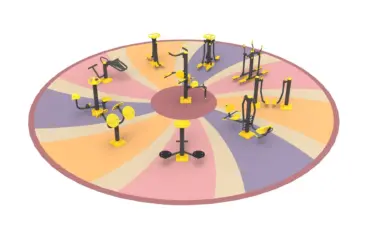
Our outdoor fitness trail range is built for this kind of installation, and the individual fitness trail stations can be combined into a circuit sized to the site. A multi-station unit such as the Multifunction Trainer BLO-080 covers several exercises on a single footprint, which is often the right answer where space along the route is limited.
Step 2: planning and construction
Once all the necessary equipment has been gathered, the next step is planning and building the trail.
Site preparation comes before any construction. Make sure the ground is level and cleared of any obstacle that could cause an accident during installation or in use. Take account of every potential hazard that could present a risk to users and deal with it accordingly.
Building the foundation is critical to the strength and durability of the trail. The foundation provides the support the equipment needs and helps distribute the load evenly. Use the correct materials and follow the instructions strictly when building it.
Then comes the part everyone waits for: installing the equipment. This is where the work pays off and the trail takes shape. Follow the manufacturer instructions carefully during installation. Check twice that everything is secure and stable before letting anyone use the trail.
One point that is regularly underestimated at this stage is the surface. The impact-attenuating surface under and around each station is dimensioned from the free fall height of that station, which means it is a per-station calculation, not a single blanket figure for the whole trail. Get the free fall heights from the manufacturer documentation for the stations you have actually bought, and size the surfacing from those.
A well built and well maintained trail will deliver years of enjoyment and health benefit to its users. Take the time, follow the instructions, and enjoy the process of building it.
Step 3: post-installation checks
Once the trail is installed, post-installation checks confirm that everything is in order and working as it should. Three points matter.
First, the post-installation inspection. This means a thorough check of every piece of equipment. Look for any sign of damage or wear. If you spot a problem, deal with it as soon as possible to avoid accidents and injuries. This is also the acceptance inspection: it is the moment the installation is formally received, and it is the point at which the inspection register opens.
Second, regular repair and maintenance. Doing this keeps the trail in good condition. Draw up a checklist and set reminders so that the necessary maintenance tasks are not forgotten. The maintenance plan, like the register, should exist from commissioning rather than being written after the first incident.
Third, testing the equipment. Carry out regular tests to make sure everything is functional and safe to use. If you notice a malfunction, stop using that equipment immediately and carry out repairs.
Adopt those three habits and the trail stays in excellent condition for years.
Tips for a successful installation
A few practical points make the difference on site.
Work with a partner. It makes the process more pleasant, and more importantly it means there is a second pair of hands when heavy equipment has to be lifted.
If you have any doubt about any aspect of the installation process, do not hesitate to ask for professional help. Better safe than sorry, and expert advice goes a long way towards making sure the trail is installed correctly.
Finally, make sure you understand the local regulations and guidance that apply where you are building. Requirements for public outdoor sports installations, planning consent and accessibility are set nationally and vary from one country to another, so check the framework applicable at your site rather than assuming a rule you have seen elsewhere. Getting this right avoids fines and legal problems and ensures the installation is safe and compliant.
Frequently asked questions
Which standard applies to an outdoor fitness trail?
Outdoor fitness equipment for adults falls under EN 16630. Children play equipment falls under EN 1176-1 and impact-attenuating surfacing under EN 1177. These are distinct standards and equipment for children is never certified under EN 16630.
How is the surfacing calculated?
The impact-attenuating surface is dimensioned from the free fall height of each individual station, using the free fall height stated in that station documentation. It is a per-station calculation.
What has to exist on the day the trail opens?
The acceptance inspection has to be carried out, and the inspection register and the maintenance plan have to be established from commissioning.
How much space does a fitness trail need?
That depends entirely on the stations chosen and their safety areas, which is why the site assessment comes before the equipment list rather than after it. Multi-station units reduce the footprint where the route is tight.
Can adult and children equipment share the same trail?
They can share a site, but not a specification. The adult stations are specified under EN 16630 and the children equipment under EN 1176-1 with EN 1177 surfacing, and each area is inspected against its own standard.
Getting your trail specified
In summary, a successful fitness trail installation comes down to obtaining the right equipment, planning and building the installation properly, and carrying out the post-installation checks. Follow the instructions, work with a partner, and understand the regulations and guidance that apply locally. Once it is in, a fitness trail delivers the health benefits that come with regular exercise and physical activity, to everyone who walks past it.
If you are a municipality, a campsite, a hotel, a school or a residential developer planning a trail, send us the site plan and the user profile and we will propose a station list, a layout and the surfacing that goes with it. Request a quote to get a costed proposal.
Réalisations documentées
- Parcours ninja sur mesure, Rennes – îlot des Hautes-Ourmes
- Double mur ninja extérieur, Sallanches – Haute-Savoie