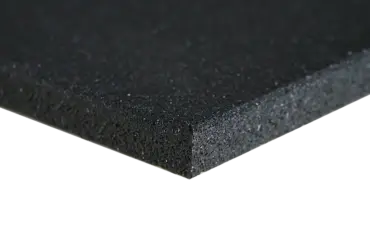
Before You Buy Gym Floor Tiles: Get the Underlay Right

Most gym floor budgets are decided on the tile and settled on the underlay. That is the wrong way round. The layer nobody quotes carefully is the one that determines how thick your finished floor has to be, how much impact noise reaches the floor below, and how long the tiles above it survive. Get it right and you buy performance without stacking millimetres you do not have.
This guide is for operators fitting out a strength area, a functional zone or a studio, particularly on an upper floor or in a building where ceiling height, door thresholds and neighbours are all constraints.
Why the underlay decides the total build up
An underlay does three jobs at once. It spreads load, so point loads from racks and machines are distributed instead of concentrating on a slab imperfection. It fills the micro irregularities of the substrate, which is what stops tiles rocking, curling at the edges and wearing unevenly. And it decouples the finished surface from the structure, which is where the acoustic performance actually comes from.
Because it does all three, a correctly chosen underlay removes the need to stack extra layers to reach the same result. That is the saving: not a cheaper product, but a thinner total floor for the same performance, which protects clear height, keeps door leaves usable and cuts the finishing work around thresholds and skirtings.
Acoustics: the reason most gyms call us
Impact noise is the complaint that closes gyms in mixed use buildings. A dropped barbell sends energy straight into the structure, and the structure carries it to the flat, the office or the treatment room below. Tiles alone absorb part of it. The underlay is what interrupts the transmission path.
Performance depends on two things: the material, which determines which frequencies are absorbed best, and continuity. A layer with hard points, gaps or crushed areas leaks noise exactly where it is discontinuous, and one badly lapped joint can undo the specification of the whole floor. Our acoustic underlay for gym floors is specified for this, laid continuously under the tiled surface.
How to choose: the criteria that matter
- Compatibility with the surface above: rubber tiles, rolls, PVC or artificial turf do not all sit on the same underlay.
- Load bearing and compression resistance. A studio floor and a lifting platform are not the same problem, and an underlay that compresses permanently under a rack has failed.
- Density, which must come from the technical sheet of the specific product for the traffic and the loads you are putting on it. Density figures quoted generically across materials are meaningless, because foam, cork and rubber underlays sit in completely different ranges.
- Installation method: floating or bonded, and whether a vapour barrier is required by the substrate.
- Fire performance where the building requires it. Take the reaction to fire class exactly as printed on the technical sheet, complete with its smoke index, and check what your building type requires under the regulations applicable in your country.
Value for money is judged over the life of the floor, not at purchase. A weak underlay lets the tiles above it deform, and you pay for that twice.
Materials
Polyethylene foam is light, quick to lay and inexpensive, and it suits light duty areas. Polyurethane foam is more resilient and holds up better under traffic. Cork is a natural option that combines thermal and acoustic behaviour and resists rot. For the loads a real strength area produces, recycled rubber is the material that survives: mechanical resistance is what a weights room actually needs, and technical felt is the choice when the priority is purely airborne sound.
Matching tile thickness to underlay thickness
The system is a pair, not two separate purchases. As a starting point for the discussion:
| Use | Tile | Underlay |
|---|---|---|
| Light duty, studio or circulation | 6 mm | 2 mm |
| Professional or sports use | 8 to 10 mm | 3 to 5 mm |
Beyond that, a free weight zone where loaded bars are dropped is a different specification again, and the thickness is driven by the drop height and the load rather than by any table: that is the job of weightlifting rubber tiles. Everywhere else, our rubber gym flooring tiles cover the range from studio to strength floor.
Where every millimetre counts
In a refurbishment, the total build up is often fixed by something you cannot move: a lift threshold, a fire door, a fixed staircase, a duct. Rather than adding layers, specify a high performance underlay in the thinnest section that meets the requirement, and check the finished level against every doorway before ordering. It is far cheaper to lose two millimetres on paper than to trim twenty door leaves after installation.
Cost: purchase price against total cost
Entry level underlays are attractive on the invoice and can need replacing sooner. Higher grade products, cork, recycled rubber and technical foams, cost more initially and last longer under the same traffic. Compare on price per square metre together with expected service life, and add the finishing work each option implies. A thinner build up saves on thresholds, skirtings and adjustments, and those are real line items in a fit out.
Installation, step by step
Preparation decides the result. Check the flatness of the substrate with a two metre straight edge or a laser level: deviations should not exceed 5 mm over that length, and anything worse is corrected with a screed or a levelling compound before anything is unrolled. The substrate must be dry, within the moisture level stated by the manufacturer, and free of oil or adhesive residue. Clean thoroughly, vacuum, then wipe.
- Roll out the underlay, leaving a small gap of a few millimetres at the walls, to be covered later by the skirting. Bond or staple the strips as recommended.
- Let the underlay settle for 24 hours if it has an integrated vapour barrier.
- Lay the tiles staggered, for a random pattern and better stability.
- Cut with a sharp blade against a metal straight edge.
- Check alignment regularly and apply even pressure with a rubber roller.
- Fit skirtings and thresholds last, leaving a small expansion allowance so the floor cannot lift.
Let the underlay and the tiles acclimatise in the room for several hours before laying, so temperature and humidity movement happens before the floor is fixed rather than after.
Frequently asked questions
Can I lay rubber tiles straight onto the slab?
You can, and in a ground floor unit with a flat slab it is sometimes the right answer. On an upper floor, or over an imperfect substrate, skipping the underlay is what produces noise complaints and rocking tiles.
Does a thicker underlay always mean better acoustics?
No. Material, density and continuity matter more than raw thickness, which is why a thin high performance product can outperform a thicker cheap one.
What thickness do I need under a lifting platform?
That is set by the load and the drop height, not by a general rule. Tell us what is being lifted and where, and we specify it.
Specifying a floor?
Send us the room area, the floor level in the building, what happens on the floor and what sits below it. You will get a build up, a total thickness and a costed proposal. Start with our quotation request form.
Réalisations documentées
- Dalles et sols sportifs : livraisons documentées – plusieurs chantiers
- Sol sportif extérieur, square Georges-Vallerey – Taverny (95)