Fitting Out a 100 m2 Strength Room: the Pitfalls That Ruin Projects
Les erreurs les plus fréquentes sur 100 m² sont le sous-dimensionnement du sol, l'absence de zone de circulation et la concentration des machines contre les murs. Chacune se corrige au stade du plan, pas après l'installation. Le calepinage du sol et le plan d'implantation se valident ensemble.
The pitfalls that ruin most 100 m2 strength room projects are not equipment failures — they are planning failures: too many machines for the floor area, circulation routes that bottleneck at peak hours, and no space left for warm-up or recovery. This guide walks through each trap, the density rules that prevent it, and what a realistic fit-out budget looks like, so you get the room right the first time.
Pitfall 1: overloading the floor with equipment
The most common mistake is treating floor area as shelf space. Owners assume more machines attract more members, so they order until the room is full. The result is a floor nobody can train on comfortably: benches back on to loaded bars, users queue in walkways, and the room feels smaller than it is.
The working rule is 5–7 m2 per equipment station, including its user clearance and share of circulation. On 100 m2, once you subtract entrance, storage and stretching space, that means roughly 12–15 stations — not the 25 that would physically fit if you ignored clearances. For a fuller treatment of this calculation, see our guide to gym equipment density per square metre.
Pitfall 2: circulation planned last, or not at all
Circulation is the first thing to draw on the plan, not the last. Users must reach every station without crossing an active barbell path or squeezing between moving machine arms.
- Main walkways: 1.5 m minimum, entrance to far wall.
- Between stations: 1 m of free space around each user position.
- Never route a walkway behind a squat rack or across a deadlift platform.
A simple test before ordering: mark the layout on the floor with tape or cardboard cut-outs and walk it. Ten minutes of simulation catches errors that cost thousands to fix after delivery.
Pitfall 3: no rest and stretching zone
A strength room with no recovery space pushes stretching onto walkways and rest onto occupied benches. Reserve 10–15 m2 with mats and wall space; benches along a wall double as rest points without consuming station area. Members consistently rate this space more highly than an extra machine.
What a balanced 100 m2 layout looks like
| Zone | Contents | Area (m2) |
|---|---|---|
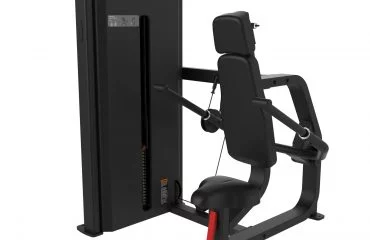
| Guided strength | 5–6 selectorised or plate-loaded machines | 35 |
| Free weights | Rack, bench zone, dumbbells 2–40 kg | 25 |
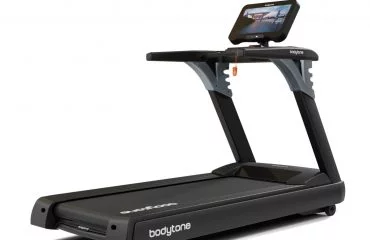
| Cardio | 3–4 units (treadmill, bike, rower) | 18 |
| Stretching and recovery | Mats, wall bars, foam rollers | 12 |
| Circulation and storage | Walkways, plate and accessory storage | 10 |
For a machine-by-machine shopping list on this floor area, see our 100 m2 gym equipment list; for zoning variants focused purely on strength, see 100 m2 strength floor zoning.
Pitfall 4: single-purpose machines before versatile stations
On 100 m2 every machine must justify its footprint. A half rack with pull-up bar, an adjustable bench and a dual-function cable station each cover many movements; an isolated single-joint machine covers one. Build the core of the room from versatile stations first, then add targeted machines only where member demand proves it.
Pitfall 5: budgeting for equipment but not for the room
Flooring, lighting and ventilation are routinely forgotten, then squeezed out of the budget at the end — exactly the items that cannot be retrofitted cheaply. An indicative budget for a 100 m2 strength room, excluding VAT (project estimates — final figures depend on models chosen):
| Item | Indicative budget (EUR excl. VAT) |
|---|---|
| Strength equipment (racks, machines, free weights) | 15,000–35,000 |
| Cardio equipment (3–4 professional units) | 8,000–18,000 |
| Rubber flooring (tiles, incl. thicker lifting zone) | 3,000–6,000 |
| Rest-zone furniture and storage | 1,000–2,500 |
| Lighting and ventilation upgrades | 1,500–4,000 |
Equipment for a commercial floor used without supervision should be certified Class S under EN ISO 20957-1:2024 — a compliance point that also rules out the cheapest online offers before they waste your time.
Pitfall 6: choosing equipment nobody has tested
Order from data sheets alone and you discover ergonomics problems after delivery. Test the key stations in a showroom or reference site, check adjustment ranges against your actual member profile, and ask for references from comparable facilities. A supplier who has equipped rooms of your size can show you working layouts, not just catalogues.
The 90-day review: how a 100 m2 layout should evolve
No layout survives contact with real members unchanged, and the best operators plan a formal review at day 90. Three data points tell you almost everything. First, peak-hour occupation per station: any machine idle through the busiest slots is a candidate for replacement by what members queue for. Second, the queue points: if the rack has a waiting list every evening while two isolation machines gather dust, the mix — not the floor area — is the constraint. Third, the walkway test repeated under load: tape lines that worked empty often fail with fifteen users and their bags. Budget 5–10 percent of the initial equipment spend for this correction round; ordering everything definitively on day one and never revisiting is itself one of the traps this guide exists to prevent.
Ventilation and lighting: the invisible half of comfort
Members rarely praise good air; they always punish bad air. A 100 m2 strength room at peak occupancy needs mechanical ventilation sized to the occupant load of a sports premises, not an office — and the difference is felt within twenty minutes of a busy class. Lighting follows the same logic: aim for uniform 300 lux over training zones, avoiding glare above bench stations where users look upward. Both items cost a fraction of one machine and shape retention more than any single equipment choice; they are listed in the budget table above precisely because they are the lines most often deleted first and regretted longest.
Sequencing the fit-out: order matters
The build sequence that avoids rework: flooring first across the whole room including the thicker lifting zones, then wall-mounted items (storage, mirrors, wall bars) while access is clear, then the heavy stations positioned to the taped plan, and cardio last since it moves easiest. Delivering machines before the floor is laid — the most common scheduling error — means moving 200 kg stations twice and paying for it in labour and dented tiles. Book installation over consecutive days and keep the room closed until the layout is verified against the plan; a fit-out finished properly in four days beats one dragged over four weekends.
Frequently asked questions
How many members can a 100 m2 strength room serve?
Plan for 12–18 users simultaneously at the density of 5–7 m2 per station. As a membership base, a well-scheduled 100 m2 room typically supports 300–500 members depending on opening hours and peak spread.
What is the minimum realistic budget for 100 m2?
Around 15,000 EUR excluding VAT for a lean fit-out built on free weights, one or two multi-stations and entry-level professional cardio. A comfortable, machine-rich floor sits closer to 40,000–60,000 EUR excluding VAT.
Should cardio and strength share the same 100 m2?
Yes, if strength is the core offer, keep cardio to 3–4 units for warm-up. If cardio is a genuine part of the offer, 100 m2 becomes tight; consider whether an adjacent room can take it.
What flooring thickness does a 100 m2 strength room need?
15–20 mm rubber tiles across the general floor, increased to 30–40 mm under free-weight and deadlift zones. Zoning the thickness saves money without compromising protection.
How do I know if my layout has enough circulation?
Walk the taped-out plan with two other people during the design stage. If any of you has to wait or sidestep to reach a station, the layout fails at peak hour with fifteen users.
Get your layout checked before you order
Light In Fitness has fitted out more than 2,500 customers since 2013. Send us your floor plan and we will return a zoned layout proposal and an itemised quotation, free of charge, within 24 working hours. Request your free quote.